Friday 17 July 2015

Just starting a new project....

I bought some patterns fro Lori at Not Forgotten Farm and this is a free hand cross stitch pattern I am working on an antimacassar I bought from a charity shop. I bought 3 of them they weren't a set so they weren't usable in the traditional sense so I thought I'd use them for cross stitch and embroidery. The other 2 I have tea dyed, see my earlier post here.
 
 
This shows the fabric as being lighter in colour than it actually is

This is closer

i'll share with you when it is completed.

Bright Blessings from the Cabin xxx


Tea dying fabric...

I have quite a bit of fabric that I want to use for my cross stitch designs and embroidery designs. I have seen on many blogs about dying the fabric with walnut dye, I would love to do this but I don't have any black walnuts, so I decided that teabags will have to do.
 
 
Fabrics to be dyed

This linen is a goldy yellow colour


fabric in bowl

teabags in bowl of boiling water to infuse

fabric out to dry

dyed fabric
 The tea dye isn't too strong in colour, you can make it stronger but adding more teabags.
 
this is the goldy yellow colour fabric, the tea dye has toned down the yellowness of it.


I added a couple of cinnamon and mango herbal teabags to the mix for scent.

I will iron the fabric that needs ironing and cut the larger pieces into fat quarters, a more manageable size. I don't want to cut them any smaller as I don't know the size if the project I will use them for yet.

bye for now

Bright Blessings from the cabin xxx


Garlic and onion harvest and beets on the way...

Last weekend we harvested our garlic, I had never grown it before and though there was plenty of foliage to be seen....
 
Garlic on the right this was quite early on.

I didn't know if there was anything going on in the earth. so with some trepidation hubby pushed the fork in and slowing lifted the earth; and surprise, surprise up came lots of garlic bulbs. Some are quite small but that doesn't matter. Here they are drying off....


You can see in the top photo on the left the foliage of the red onions. These were amazing, they didn't grow particularly large but the just grew out of the ground almost harvesting themselves he he. Like the garlic we had not grown onions before but we will be again this year.

The onion and garlic sets are planted in the fall and harvested in July the following year. The main draw back to this is space. I only have the patch of ground they were for growing outside (other than containers) so they do delay the planting of my butternut squash plants. Still this weekend we will (or I should say hubby) will be digging this tiny patch of earth over and digging some nutrient rich earth and I will get the squash plants and my final 2 sweet corn plants planted.

And finally, my beets. they are growing in the greenhouse and one side the leaves are enormous, while I was in the greenhouse tying up my tomato plants I noticed that some of the beets are showing above the ground, they are not as big as I thought they might be going the leaves but it might not be time to lift them yet. I will check my growing vegetables book.

I will share my beet harvest soon.

Bright Blessings from the Cabin xxx


Monday 13 July 2015

Finally finished...

I am so pleased to share with you all that I have finished my first hooked rug.
 

I am running a competition on my Facebook page to name the pattern which I plan to sell in my Etsy shop.


This has inspired me to design and make more rugs, but I also have some patterns from Not Forgotten Farm that I am looking forward to making. As I am not finding it very easy to get wool fabric for rug hooking I will probably make them using t-shirts, like my rug.
 
I do have a largish piece of green wool fabric that I want to cut up and over dye pieces. I would like to use natural dyes so I shall be investigating recipes. I will let you know how I get on.
 
 
Bright Blessings
 
 
From the Cabin xxx

Saturday 4 July 2015

Nearly there...

Ok, I've finished cutting my t-shirts into strips and have wound them onto the wooden spools...
 
I watched a You Tube video of a lady who was cutting t-shirts for braided rugs and I thought I use that idea for a quicker way for cutting my strips...

 
By folding the fabric in half, then half again


Always clean your mat after each t-shirt as they leave a mess behind that will transfer to your next t-shirt, which in itself isn't a major problem but it just gives you extra work so it's easier to clean as you go and while the mat is drying you can (as I did) wind your strips onto your spools.


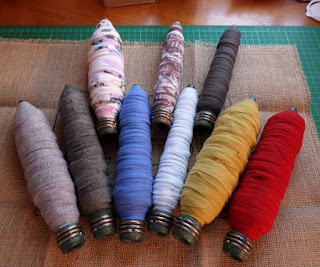
What a lovely array of colours and they look so cool on the spools.


This is the hook I will be using from Fred Aldous


Before transferring the design I stitched a zigzag stitch around the edge so the fabric wouldn't un weave while I was working.


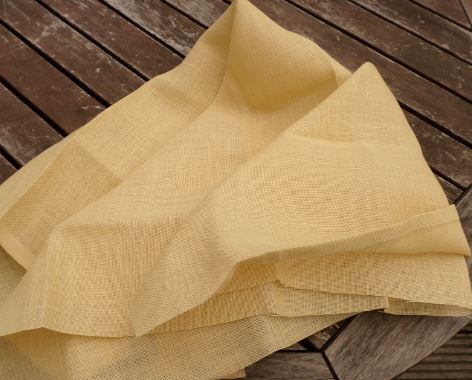
Then it was transferring onto my jute fabric backing ( cheap one from The Works as this is my first rug and lesson). I don't seem to be able to get hold of red dot transfer fabric in the UK, so I had to improvise using tracing paper.....


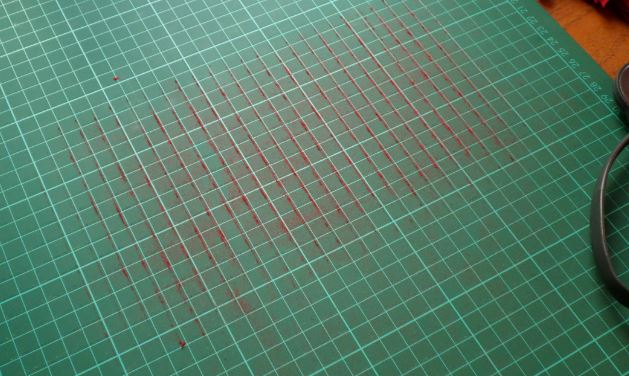
Then it was a case of transferring my design from my note book with a sharpie pen...


I made holes with a hole punch first, which wasn't that successful, so I followed the lines of the design and punched holes using a large needle; the batting was something soft to work on so the needle went through the paper.


Here is the design on the fabric. following instruction I found on beginners rug hooking, I don't have the link today but I will find it again and share it with you all. I stitch along the  rectangular outline and then a second stitch line a 1/4 inch outside of that....


The stitching is difficult to see in the photo as the thread is a similar colour. This stitching helps stabilise the fabric when you put it in your frame.


Now I am ready to hook, come back soon to see my work in progress...


Bright Blessings


From the Cabin xxxxx